
Why You Might Need to Rotate a Photo on iPhone
Have you ever snapped a perfect picture, only to find it appears sideways or upside down later? You’re definitely not the only one. Many iPhone users run into this issue, but the fix is quick and simple; it only takes a few taps.
Whether you’re posting to social media, putting together an album, or just organizing your camera roll, learning how to rotate photos correctly is a small but essential skill for any iPhone owner.
Common Reasons Photos Appear Sideways or Upside Down
Photos can display in the wrong orientation for a few common reasons. Sometimes, it happens when importing images from another device or downloading them through email. Pictures taken while lying down or at an angle can also save in an unexpected direction.
Older images imported from digital cameras or scanners may show up sideways, and certain apps ignore the orientation data (EXIF metadata) stored in photos leading them to display incorrectly.
Understanding iPhone’s Auto-Rotation Feature
Your iPhone includes built-in sensors that detect how you’re holding the device when taking a photo. This data is stored as metadata, telling apps which way the photo should appear.
However, this system isn’t foolproof. If orientation lock is turned on, or if your phone is lying flat on a surface, the sensors might not record the correct angle. Knowing how this works can help you prevent orientation mistakes in the first place.
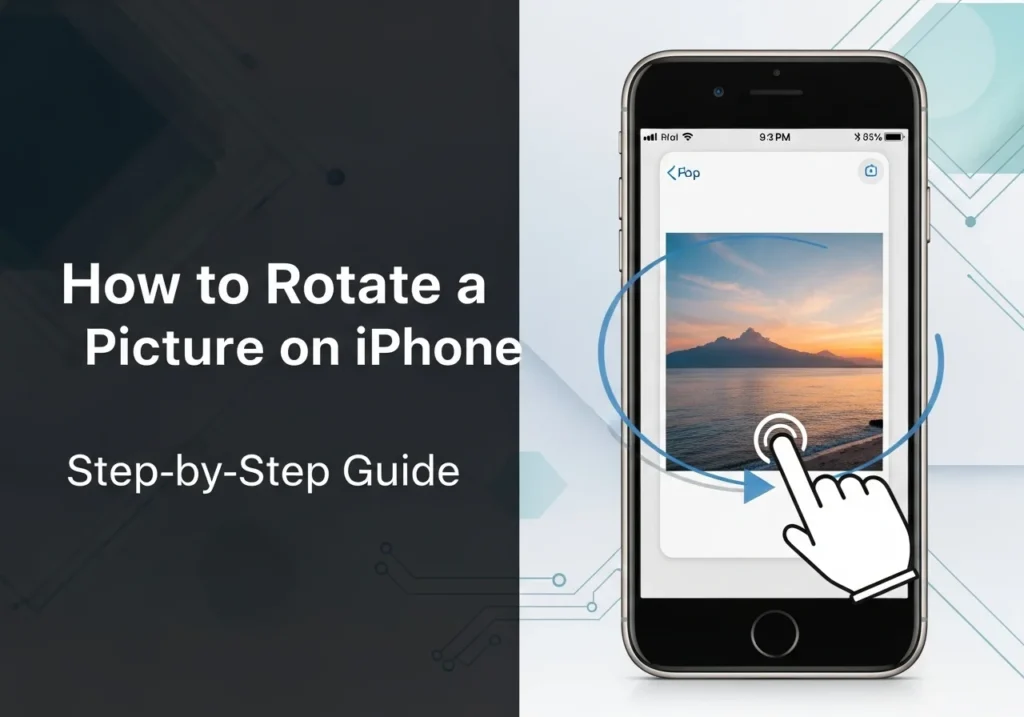
How to Rotate a Photo Using the Photos App
The Photos app is the simplest and most reliable way to rotate pictures on your iPhone. It’s already built into iOS and includes powerful tools that don’t require any additional downloads.
Step-by-Step: Rotate a Single Photo
- Open the Photos app and locate the image you want to fix.
- Tap the photo to view it full-screen.
- Tap Edit in the top-right corner.
- Tap the Crop icon (two overlapping right angles).
- Tap the Rotate button (a square with a curved arrow).
- Each tap rotates the photo 90° counterclockwise.
- Tap Done to save your changes.
The rotation is applied instantly and permanently but don’t worry, you can always revert to the original later.
Rotating Multiple Photos at Once
Unfortunately, the Photos app doesn’t include a batch rotate feature. You’ll need to rotate photos one at a time.
If you frequently need to rotate multiple images, third-party apps like Photo Investigator or Image Size can help you process several photos simultaneously. For casual users, though, rotating manually works fine.
Reverting a Photo to Its Original Orientation
If you rotate a picture by mistake or simply change your mind, you can easily restore it:
- Open the rotated photo in the Photos app.
- Tap Edit → Revert (bottom-right).
- Choose Revert to Original.
This removes all edits, including rotation, filters, or brightness adjustments, and restores the photo to its original version.
How to Rotate a Picture Using the Camera App
The Camera app treats orientation differently than Photos, and understanding this can help you avoid issues before they happen.
Does the Camera App Rotate Photos Automatically?
Yes. The Camera app automatically records orientation data using your iPhone’s accelerometer and gyroscope. This ensures your photo appears correctly in the Photos app and most other software.
However, not every app reads this data. That’s why photos may sometimes appear sideways when viewed on non-Apple devices or in programs that ignore metadata.
Preventing Sideways Photos When Shooting
To make sure your photos save correctly:
- Swipe down from the top-right (or up on older iPhones) to open Control Center.
- Ensure Orientation Lock is turned off.
- Hold your phone upright and notice that the Camera app’s interface (icons and shutter button) rotates; that’s how you know it’s detecting your position properly.
If you still end up with a sideways photo, simply rotate it later using the Photos app.
Rotating Photos with Third-Party Apps
The built-in Photos app works perfectly for basic fixes, but third-party apps add advanced features like fine-angle rotation and batch processing.
Rotating Photos in Fotor
Fotor is a popular photo editor with an intuitive rotation tool.
Here’s how to use it:
- Download Fotor from the App Store and open it.
- Tap Edit a Photo and choose your image.
- Select the Crop tool.
- Use the Rotate button for 90° turns or drag the slider for precise adjustments.
- Tap the checkmark to apply changes.
- Save your photo.
Fotor also lets you straighten horizons and correct perspective, great for landscape and architecture shots.
Using Snapseed or Lightroom
Snapseed (free from Google) and Adobe Lightroom Mobile both offer excellent rotation controls.
- Snapseed: Tap Tools → Rotate, then drag or tap arrows to adjust the angle precisely.
- Lightroom: Tap Crop, then use the slider or rotation icons. Lightroom preserves maximum image quality and syncs with Creative Cloud.
Both are excellent for advanced editing workflows.
Best Free Apps for Rotating and Flipping Photos
Here are some reliable, free apps that let you rotate or flip photos easily:
- Snapseed: Pro-level features, easy to use.
- Photo Editor by Aviary: Simple, ad-supported editor.
- Photo Rotate: Focused solely on rotation, includes batch tools.
- Microsoft Office Lens: Excellent for scanning and straightening documents.
How to Flip or Mirror an Image on iPhone
Flipping and rotating aren’t the same. Rotation changes the image angle, while flipping mirrors it horizontally or vertically.
Rotation vs. Flipping The Difference
- Rotate: Turns a photo by 90°, 180°, or 270°. Text remains readable if rotated correctly.
- Flip: Creates a mirror image text appears backward, and the scene looks reversed.
Flipping is useful for selfies or artistic effects.
How to Flip a Selfie Horizontally
By default, your iPhone’s camera shows a mirrored preview but saves the un-mirrored version.
To make your saved selfies appear exactly as shown on-screen:
- Go to Settings → Camera.
Turn on Mirror Front Camera.
For older selfies, you can flip them manually:
- Open the image → Edit → Crop icon.
- Tap the Flip button (two overlapping triangles).
- Tap Done.
This feature is available on iOS 13 and later.
How to Rotate Photos Without the Photos App
If you’re working in other apps, there are still ways to rotate pictures without opening Photos.
Using Files or Notes
Files App:
- Open Files and find the image.
- Tap it → Share icon → Look for Rotate (depending on iOS version).
- If unavailable, save to Photos and rotate there.
Notes App:
- Open a note with an image.
- Tap and hold the image → Markup → Rotate icon.
- Changes are saved automatically.
These are handy when you’re managing images within these apps already.
Rotate Photos Before Uploading to Social Media
Most social platforms offer basic rotation tools during upload:
- Instagram: Use two fingers to pinch and rotate before posting.
- Facebook: Tap Edit → Rotate before sharing.
- Twitter: Tap the edit icon after selecting your photo to adjust it.
These edits don’t affect the original image in your Photos library, only the uploaded version. Want to make sure your photos upload correctly and don’t take up unnecessary iCloud space? Check out our guide on How to Manage iCloud Photos for smart storage tips.
Troubleshooting: When You Can’t Rotate Photos
Sometimes the rotate option may not appear, or it doesn’t work properly. Here’s how to fix that.
Rotate Option Missing or Greyed Out
If the rotate tool is unavailable:
- Make sure the photo is fully downloaded from iCloud.
- If it’s in a shared album, save it to your personal library first shared photos may have restricted permissions.
- Check your iPhone’s storage space; limited storage can block edits.
Fixing Orientation for Imported Photos
When importing images from a camera or another device, orientation data may be lost. If your imported photos aren’t displaying correctly due to iCloud syncing issues, try using our iCloud Storage Analyzer to check for backup or sync problems.
To fix it:
- Open the image → Edit → Crop.
- Manually rotate to the correct position.
- Tap Done.
This embeds the correct rotation directly into the file so it displays properly everywhere.
Rotation Still Not Working?
Try these steps:
- Restart the Photos app (swipe it away and reopen).
- Restart your iPhone.
- Update iOS to the latest version.
- Free up storage to allow editing functions to work properly.
If rotation continues failing, the photo file might be corrupted try re-saving it or editing it in another app.
Advanced Tips: Maintain Quality While Rotating Photos
Rotating photos shouldn’t affect their quality, but here’s how to ensure that.
Avoid Losing Resolution
Rotating in 90° increments is lossless; it doesn’t compress or degrade your photo. The Photos app performs this kind of rotation automatically.
However, third-party apps may apply compression when saving. Always use “high-quality” export settings to avoid minor quality loss, especially with JPEGs.
Rotating HEIC and RAW Photos
- HEIC (the default iPhone format) rotations in the Photos app are completely lossless.
- RAW and ProRAW images also maintain full quality after rotation the underlying data remains untouched.
Avoid converting to JPEG before rotation if possible, as that can cause slight degradation.
Related Editing Tools Worth Knowing
Rotation often goes hand-in-hand with cropping, straightening, and aligning your shots.
How to Crop and Straighten
- Open the photo → Edit → Crop.
- Drag corners to crop.
- Use the dial below to straighten horizons.
- Tap Done to save.
This helps fix tilted horizons and frame your subjects more cleanly.
Adjust Alignment After Rotation
After rotating, fine-tune the photo using the straighten tool.
Gridlines help you align subjects using the rule of thirds for professional-looking results.
Final Thoughts: Simplify Your iPhone Photo Editing
Learning how to rotate photos on iPhone might seem basic, but it makes a big difference in how your images look and feel. Whether you’re sharing moments online or just organizing your gallery, a correctly oriented image always stands out.
When to Use Built-in Tools vs. Third-Party Apps
- Photos app: Best for quick, lossless rotation.
- Third-party apps: Ideal for bulk edits or precise angles.
For most users, the Photos app is more than enough. It’s fast, accurate, and built right into iOS.
Why It Matters
A sideways photo can ruin an otherwise perfect shot. Taking a few seconds to rotate your images ensures they look professional and intentional every time.
Master these simple tools, and you’ll never again have to deal with upside-down or sideways photos on your iPhone.
Frequently Asked Questions
Can I rotate photos permanently?
Yes. Once you rotate and tap Done, the change is saved. But you can always Revert to Original if needed.
Does iPhone automatically rotate photos?
It embeds orientation data when taking photos, but it doesn’t fix existing sideways ones automatically.
Can I rotate iCloud or Mac photos?
Yes. Edits made on one device sync across all devices connected to your iCloud account.